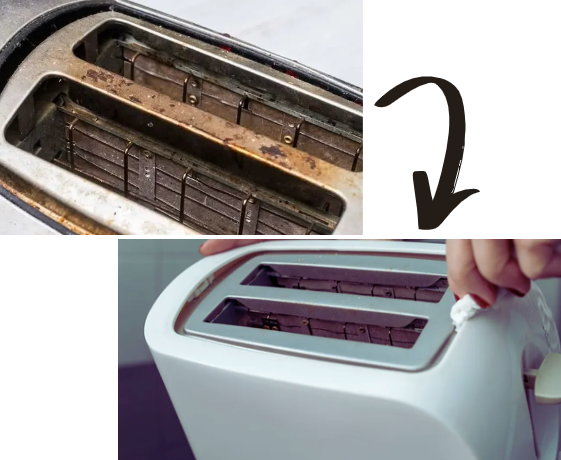
Cleaning a toaster might not be at the top of your to-do list, but it’s an important task to maintain its performance and keep your kitchen looking tidy. Over time, crumbs and grease can build up, and a neglected toaster can not only look unsightly but also lose efficiency. Luckily, I’ve got a tried-and-true method that my Nana swears by—a simple trick using ingredients you probably already have at home. It’s quick, easy, and budget-friendly, and the best part is that you don’t need any fancy cleaners or expensive tools.
Curious to know Nana’s secret? Let’s dive right in!
The Powerful Duo: Vinegar and Baking Soda
You may be surprised, but the combination of white vinegar and baking soda is all you need to tackle a greasy toaster. These pantry staples work together to break down stubborn grease and grime, while their gentle abrasiveness lifts dirt without damaging surfaces. Best of all, both ingredients are natural, non-toxic, and budget-friendly—so you can clean your toaster effectively without worrying about harmful chemicals.
Let’s walk through Nana’s simple process step by step:
Step-by-Step Guide to Cleaning Your Toaster
- Safety First: Unplug and Prepare the Toaster Before you start cleaning, make sure your toaster is unplugged and completely cool. This is key to both your safety and making the cleaning process smoother. If your toaster has a removable crumb tray, take that out first. Gently shake the toaster upside down over a trash can or sink to release any crumbs.Nana’s tip: Be gentle when shaking to avoid damaging any internal parts of the toaster.
- De-grease the Exterior Next, we tackle the grease. In a small bowl, mix equal parts white vinegar and warm water. Soak a soft cloth or sponge in the mixture, wring it out, and then wipe down the toaster’s exterior. Focus on areas that have the most grease buildup. The vinegar will quickly start breaking down the oily residue.For stubborn spots, gently scrub them with some baking soda on your cloth. Its mild abrasiveness will help lift the grime without scratching the surface.Important: Avoid getting any cleaning solution on the toaster’s electrical parts or heating elements.
- Clean the Nooks and Crannies Toasters have plenty of small spaces where grease and crumbs hide. For these tricky spots, Nana suggests using an old toothbrush or a cotton swab. Dip it in the vinegar solution and gently scrub around buttons, knobs, and other hard-to-reach areas.If your toaster has a removable tray or parts, fill a container with warm water and a splash of vinegar. Let the pieces soak for 10–15 minutes to loosen any gunk, then scrub with baking soda, rinse, and allow to dry.
- Final Polish After cleaning all the greasy spots, wipe down the toaster with a clean damp cloth to remove any leftover vinegar or baking soda residue. For a shiny finish, use a microfiber cloth to give it a streak-free polish.Nana’s secret tip: If your toaster is stainless steel, rub a small amount of olive oil or baby oil onto a microfiber cloth and gently buff the surface in the direction of the grain for a glossy finish that resists fingerprints.
- Let It Dry and Reassemble Allow your toaster to air dry for at least 30 minutes before plugging it back in. If you’re in a hurry, you can dry it off with a towel, but make sure no moisture is left inside. Once it’s dry, reassemble any parts, and your toaster is good as new!
Why This Method Works
The combination of vinegar and baking soda is a cleaning powerhouse, and it’s no wonder it’s a favorite cleaning hack passed down through generations. The acidity of vinegar breaks down grease, while the gentle abrasion of baking soda helps lift stubborn dirt without damaging your toaster. Plus, when these two ingredients mix, they create bubbles that loosen dirt from hard-to-reach places.
This method is also safe and natural, unlike harsh chemical cleaners that can leave harmful residues around food prep areas. Since vinegar and baking soda are both non-toxic, you can clean your toaster with confidence, knowing it’s safe for both you and your family.
Other Benefits of This Simple Hack:
- No Harsh Chemicals: Many commercial cleaners contain chemicals that can leave behind residues, especially in food prep areas. Vinegar and baking soda are completely safe and free from harmful additives.
- Eco-Friendly: Both ingredients are environmentally friendly alternatives to chemical cleaners, so you can feel good about reducing your chemical footprint.
- Cost-Effective: Chances are, you already have these ingredients in your pantry, making this an affordable option that doesn’t require special products or trips to the store.
- Minimal Effort: The best part? This method requires very little scrubbing! Vinegar dissolves grease, and baking soda gently scrubs, all with minimal effort on your part.
Enjoy a Clean Toaster in No Time!
So next time your toaster is covered in crumbs or grease, don’t stress. With Nana’s easy vinegar and baking soda trick, you can get it sparkling clean in no time, without a lot of work. This natural method is gentle, effective, and will restore your toaster to its shiny, brand-new state. Whether you’re preparing for guests or just keeping your kitchen in tip-top shape, this simple trick is sure to keep your toaster looking and performing like new.
Ready to give it a go? Gather your vinegar and baking soda, and start cleaning today. Your toaster will thank you!
 Skip to content
