 Skip to content
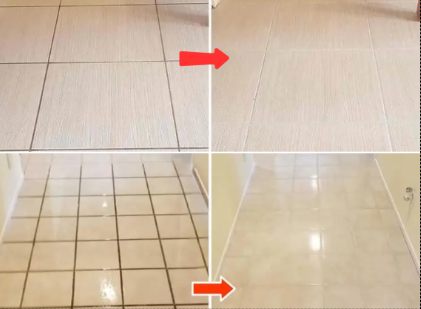
Cleaning floors and grout lines can often feel like an overwhelming chore, especially as dirt and grime build up over time. But the good news is, getting sparkling clean floors and grout doesn’t have to take hours of backbreaking work or cost a fortune in cleaning products. With a few simple tools, a smart approach, and a little bit of patience, you can clean both in one go. Here’s how you can do it effectively and efficiently.
Why Do Floors and Grout Lines Get Dirty?
Grout lines are naturally porous, which makes them prone to collecting dirt, grease, and even mold. Floors, particularly in high-traffic areas, gather dust, food particles, and spills that often go unnoticed. Traditional mopping can miss the grout lines, making them appear darker and dirtier over time.
The Secret to Clean Floors and Grout
The key to cleaning both floors and grout in one go is to use a deep-cleaning solution combined with a methodical approach. Follow this step-by-step guide for a spotless result:
What You’ll Need
Cleaning Supplies:
- Baking soda
- White vinegar
- Dish soap
- Warm water
- Hydrogen peroxide (optional, for stubborn stains)
- Essential oils (optional, for fragrance)
Tools:
- Scrub brush or an old toothbrush (for grout)
- Mop or microfiber cloth (for floors)
- Spray bottle
- Bucket
Step-by-Step Cleaning Process
Step 1: Prepare Your Cleaning Solution
To create a natural grout cleaner, mix:
- ½ cup of baking soda
- ¼ cup of white vinegar
- 1 tablespoon of dish soap
- 2 cups of warm water
For extra cleaning power, add a small splash of hydrogen peroxide for those tough stains.
Step 2: Apply the Solution to Grout Lines
Pour the solution into a spray bottle. Generously spray the grout lines and let it sit for 10-15 minutes. This gives the solution time to break down and loosen the dirt.
Step 3: Scrub the Grout
Use a scrub brush or an old toothbrush to scrub the grout lines, applying moderate pressure to tackle the dirt. For stubborn spots, sprinkle a bit of baking soda directly onto the grout and scrub again for extra cleaning power.
Step 4: Mop the Floors
While the grout solution works its magic, make a floor-cleaning solution by mixing 1 gallon of warm water with a few drops of dish soap and a splash of vinegar. Mop the floors thoroughly to remove surface dirt.
For wood or laminate floors, skip the vinegar to avoid any damage, and instead use a cleaner suited for those materials.
Step 5: Rinse and Buff
Once you’ve scrubbed the grout lines, rinse the area with clean water to remove any residue. Use a clean, damp mop or microfiber cloth to wipe down the entire floor. Finally, buff the floor dry with a fresh, dry cloth to reveal a streak-free shine.
Tips for Maintaining Clean Floors and Grout
- Seal Your Grout Lines: After cleaning, consider applying a grout sealer to help prevent future stains and reduce the amount of maintenance needed.
- Daily Maintenance: Sweep or vacuum regularly to remove debris, and clean up spills right away to prevent stains from setting in.
- Monthly Deep Cleaning: Aim to clean your grout once a month for ongoing cleanliness.
- Steam Cleaners: If you’re looking for a chemical-free option, a steam cleaner can effectively sanitize and deep-clean both floors and grout.
Why This Method Works
The combination of baking soda and vinegar creates a natural fizzing reaction that helps break down dirt and grime. Dish soap cuts through grease, while hydrogen peroxide tackles stubborn stains. Together, these ingredients form a powerful, eco-friendly cleaning solution.
Conclusion
With the right tools and a bit of effort, achieving spotless floors and clear grout lines is entirely possible. By following this method, you’ll not only restore the beauty of your floors but also extend their lifespan. The next time you clean, give this technique a try for a quick and effective way to tackle both your floors and grout, leaving your home sparkling clean.